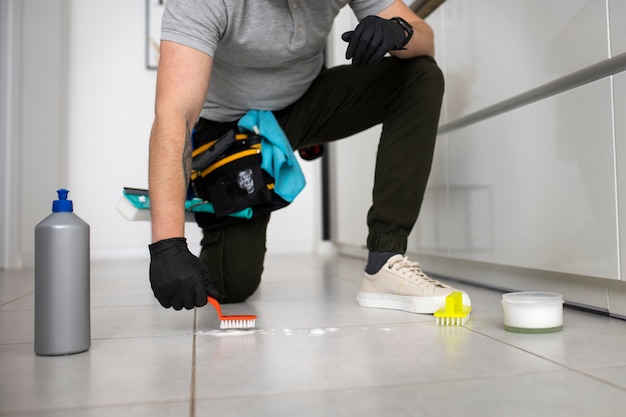
Cleaning bathroom grout is an essential yet often overlooked task that can make a significant difference in the appearance and hygiene of your bathroom. Over time, grout lines between tiles can accumulate dirt, stains, and mildew, leading to an unsightly and unhygienic bathroom environment. In this comprehensive guide, we will walk you through the step-by-step process of cleaning bathroom tile grout, effectively and efficiently, using simple household items and eco-friendly solutions. Say goodbye to dirty grout and hello to a fresh and pristine bathroom!
Understanding the Importance of Cleaning Bathroom Grout

Before delving into the cleaning process, let’s understand why it’s crucial to maintain clean bathroom grout. Grout serves as a sealant between tiles, preventing water and moisture from seeping through and causing damage. However, the porous nature of grout makes it susceptible to dirt, soap scum, mildew stains and mold buildup over time. Neglected grout not only affects the appearance of your bathroom but can also lead to the growth of harmful bacteria and mildew, posing potential health risks.
Gathering Your Cleaning Arsenal
Before you start cleaning, gather the following items:
- Baking Soda: A versatile and non-toxic cleaning agent known for its ability to tackle tough stains and grime.
- White Vinegar: A natural disinfectant that cuts through soap scum and eliminates mold and mildew.
- Hydrogen Peroxide: An effective stain remover that works wonders on grout stains.
- Spray Bottle: Use this to create your cleaning solutions and apply them precisely.
- Warm Water: Acts as a solvent to help dissolve dirt and grime.
- Grout Brush: A stiff-bristled brush specially designed to clean grout lines effectively.
- Paper Towel: For wiping and drying surfaces.
- Rubber Gloves: Protect your hands while handling cleaning solutions.

H2: Preparing the Cleaning Solutions
Now that you have your cleaning supplies and arsenal ready, it’s time to prepare the cleaning solutions. Here are two simple and effective recipes:
- Baking Soda Paste: Mix baking soda with a small amount of water to create a thick paste. This paste is excellent for targeting stubborn stains and grime.
- Vinegar Solution: In a spray bottle, combine equal parts of white vinegar and warm water. This solution will help eliminate soap scum and kill mold and mildew.
Step-by-Step Guide to Cleaning Bathroom Grout
Follow these steps to achieve sparkling clean grout in your own bathroom tiles:
Step 1: Preparing the Grout Surface
Start by clearing the bathroom area around the tiles and removing any personal items or obstacles that might hinder the tile cleaning process. This will give you ample space to work efficiently.
Step 2: Dry Brushing
Before applying any cleaning solution, use a grout brush to remove loose dirt, debris, and surface stains from the grout lines. This dry brushing process will make the subsequent cleaning much cleaner and more effective.
Step 3: Applying the Baking Soda Paste
For tough stains, apply the baking soda paste directly onto the stained grout lines. Use your grout brush to work the paste into the grout, applying gentle pressure in a circular motion. Allow the baking soda paste to sit on the grout for about 15 minutes. This will give it time to penetrate and loosen the tough grout stains up.
Step 4: Spraying the Vinegar Solution
While the baking soda paste sits, grab your spray bottle with the vinegar solution. Spray the solution directly onto the grout lines, covering the areas where you applied the baking soda paste. The chemical reaction between the baking soda and vinegar will create a foaming action in cleaning grout, further loosening dirt and grime.
Step 5: Scrubbing the Grout Lines

After allowing the baking soda paste and vinegar solution to interact, take your grout brush and start scrubbing the grout lines again. The combination of baking soda and vinegar will create a powerful scrub and cleaning agent that lifts tough stains and grime effortlessly.
Step 6: Rinsing the Grout
Once you’ve thoroughly scrubbed the grout lines, rinse the area with warm water. Use a clean cloth or paper towel to wipe the scrub brush away any excess cleaning solution and residue. The warm water will help flush out loosened dirt and ensure a fresh finish.
Step 7: Let It Air Dry
Finally, allow the grout lines to air dry. Avoid stepping on or using the shower or bathroom during this time to prevent any new dirt from settling into the freshly cleaned grout.
Preventive Measures for Clean Grout
Now that you’ve successfully cleaned your bathroom grout, follow these preventive measures to keep it clean and fresh for longer:
- Regular Cleaning: Make it a habit to clean your bathroom grout regularly to prevent the buildup of dirt and grime.
- Ventilation: Ensure proper ventilation in your bathroom to minimize moisture and discourage mold growth.
- Dry After Showering: Wipe down the tiles and grout lines with a dry cloth or towel after showering to remove excess water and soap scum.
- Grout Sealing: Consider applying a grout sealer to create a protective barrier against stains and moisture.
Conclusion

Cleaning bathroom grout may seem like a daunting task, but with the right tools and techniques, it becomes a manageable and rewarding process. Regular cleaning and preventive measures will not only keep shower walls in your bathroom looking pristine but also ensure a healthier and more hygienic space for you and your family. So, roll up your sleeves, follow our step-by-step guide, and say hello to clean and gleaming bathroom grout!


