
A dazzling crystal chandelier can be the centerpiece of elegance and sophistication in any room. However, over time, dust and grime can diminish its shine. Regular, deep cleaning is essential to keep your crystal chandelier sparkling like new. In this guide, we’ll walk you through the steps to clean your crystal chandelier effectively.
Why Cleaning Your Crystal Chandelier Matters
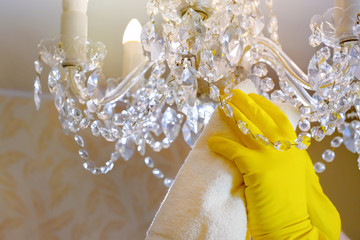
Crystal chandeliers are not just lighting fixtures; they are also intricate pieces of artistry. Dust and dirt can accumulate on the crystals and diminish their brilliance. A clean crystal chandelier not only enhances the aesthetics of your space but also ensures that light can refract beautifully through the prisms, creating a mesmerizing play of colors.
Tools and Materials You’ll Need
Before we delve into the cleaning process, gather the following items:
- Lint-free cloth or microfiber cloth: These materials are essential for preventing lint or residue on the crystals.
- Cleaning solution: A gentle cleaning solution is recommended to avoid damaging the crystals. You can make your own solution by mixing lukewarm water with a few drops of mild dish soap or isopropyl alcohol.
- White cotton gloves: Wearing gloves will prevent fingerprints on the crystals as you clean.
- Ladder: Ensure you have a safe and sturdy ladder to reach the chandelier.
Cleaning Your Cryst

al Chandelier Step by Step
Step 1: Turn Off the Power
Safety first. Before you start cleaning, turn off the light bulbs and the power to the chandelier at the wall switch. This precaution is vital to avoid any accidents.
Step 2: Access the Chandelier
If your crystal or chandelier fixture is installed in a high-ceilinged room, you may need a ladder to access it safely. Make sure the ladder is stable and positioned directly beneath the chandelier.
Step 3: Remove Dust and Loose Debris
Start by gently dusting the whole glass chandelier with a feather duster or a dry lint-free cloth. This will remove loose dust and debris without the need for cleaning solution.
Step 4: Prepare Your Cleaning Solution
Mix a cleaning solution using lukewarm water and a few drops of mild dish soap or isopropyl alcohol. Avoid using ammonia-based cleaners, as they can damage the crystals.
Step 5: Apply the Cleaning Solution
Wearing white cotton gloves, dip a lint-free or microfiber cloth into the cleaning solution. Gently, drop cloth to wring out any excess liquid, ensuring the cloth is damp but not dripping.
Step 6: Clean the Crystals
Carefully and systematically, wipe each crystal with the damp cloth. Start from the top and work your way down. Be thorough, paying attention to all sides of cleaning cloth and the crystals.
Step 7: Rinse and Dry
After cleaning, use a clean, damp cloth to wipe down the crystals again to remove any soap residue. Then, use a dry cloth to dry them thoroughly. This step prevents water spots and ensures a sparkling finish deep clean them.
Step 8: Reassemble the Chandelier
If you had to remove any crystals during cleaning, now is the time to reattach them. Be sure to follow the manufacturer’s instructions for reassembly.
Step 9: Turn the Power Back On
Once you’re confident that the chandelier is clean and dry, you can turn the power back on at the wall switch. Admire the renewed brilliance of the bulbs in your crystal chandelier as it bathes your room in radiant light.
Maintaining Your Crystal Chandelier

To keep your crystal chandelier looking its best, consider these maintenance tips:
- Regular Dusting: Dust your chandelier weekly or as needed to prevent the buildup of dirt.
- Time-Consuming Cleaning: A more thorough cleaning, as described above, can be done every few months or when you notice a loss of sparkle.
- Prevent Smudges: Avoid touching the crystals with your bare hands to prevent smudges. Always wear white cotton gloves when handling them.
- Regular Inspection: Periodically inspect your chandelier for loose or damaged crystals and make repairs as necessary.
Conclusion
A Sparkling Elegance
A crystal chandelier is not just a source of light; it’s a symbol of elegance and luxury. By following these steps and maintaining your chandelier regularly, you can ensure it continues to shine brilliantly and adds a touch of glamour to your home for years to come.


