The kitchen is the heart of every home—a space where families gather, meals are created, and memories are made. It’s also one of the most frequently used rooms, which means it accumulates dirt, grease, and bacteria faster than almost anywhere else. While you might regularly wipe counters and mop floors, there are numerous spots that often escape our cleaning routines.
This comprehensive guide reveals the hidden areas in your kitchen that harbor germs, grime, and odors, plus provides effective cleaning techniques to keep your entire kitchen truly spotless and sanitary.
Why These Hidden Spots Matter
Before diving into specific areas, let’s understand why cleaning these overlooked spots is crucial:
Health and Safety:
- Bacteria multiply rapidly in kitchen environments
- Cross-contamination from raw foods can spread illness
- Mold growth in hidden areas affects air quality
- Pest attraction from food residue and crumbs
- Foodborne illness prevention requires thorough cleaning
Appliance Longevity:
- Buildup reduces appliance efficiency
- Grease and grime cause premature wear
- Regular cleaning extends equipment life
- Prevents costly repairs and replacements
- Maintains manufacturer warranties
Home Value:
- Clean kitchens increase property value
- Well-maintained appliances are selling points
- Prevents permanent staining and damage
- Creates positive impression for guests and buyers
- Reduces deep cleaning costs when moving
For comprehensive kitchen cleaning guidance, see our detailed article on how to clean your kitchen.
The Top 15 Forgotten Kitchen Cleaning Spots
1. Top of the Refrigerator
Why It’s Forgotten: Out of sight, out of mind. Most people simply don’t look up there, and it’s often out of easy reach.
What Accumulates:
- Thick layer of dust and grease
- Dead insects
- Old papers or forgotten items
- Sticky grime from cooking vapors
- Potential mold in humid kitchens
How to Clean:
- Remove all items stored on top
- Vacuum loose dust with brush attachment
- Mix warm water with dish soap or all-purpose cleaner
- Wipe thoroughly with microfiber cloth
- Dry completely to prevent new dust from sticking
- Consider placing wax paper on top for easier future cleaning
- Clean quarterly or whenever you notice buildup
Pro Tip: Use a step stool safely—never stand on chairs or counters. If reaching is difficult, use a long-handled duster for regular maintenance.
2. Inside the Oven and Beneath Burner Grates
Why It’s Forgotten: Requires removing parts and getting down at floor level. The self-cleaning feature (if available) makes people think manual cleaning isn’t needed.
What Accumulates:
- Burnt food particles and spills
- Carbonized grease
- Smoke residue affecting flavor of foods
- Odors from old spills
- Fire hazards from grease buildup
How to Clean the Oven:
- Remove racks and soak in hot, soapy water
- For heavy buildup: Make paste with baking soda and water
- Spread paste inside oven, avoiding heating elements
- Let sit overnight for tough stains
- Spray with vinegar (will foam—this is normal)
- Wipe clean with damp cloth
- Use commercial oven cleaner for severe buildup (follow directions carefully)
- Replace clean racks
How to Clean Stovetop:
- Remove burner grates and drip pans
- Soak in hot water with dish soap or degreaser
- Scrub stovetop surface with appropriate cleaner
- Clean beneath where grates sit (often neglected)
- Scrub grates with brush or scrubbing pad
- Dry all parts before replacing
Frequency: Deep clean every 3-6 months; wipe spills immediately
3. Refrigerator Coils/Condenser
Why It’s Forgotten: Located on the back or underneath the fridge, completely hidden from view. Many people don’t even know they exist.
What Accumulates:
- Dust bunnies and lint
- Pet hair
- Debris from floor
- Grease particles from cooking
Why It Matters: Dirty coils force the refrigerator to work harder, increasing energy consumption by up to 35% and potentially shortening the appliance’s lifespan.
How to Clean:
- Unplug refrigerator for safety
- Locate coils (check manual if unsure)
- Pull fridge away from wall if coils are on back
- Vacuum with brush attachment
- Use refrigerator coil brush for tight areas
- Vacuum again to capture dislodged debris
- Push fridge back carefully
- Plug back in
Frequency: Every 6 months (quarterly if you have pets)
4. Inside the Refrigerator (Thoroughly)
Why It’s Forgotten: People wipe visible spills but rarely remove all shelves and drawers for complete cleaning.
What Accumulates:
- Spilled liquids that run under drawers
- Mold in crisper drawers
- Expired food in back corners
- Bacteria from raw meat drips
- Odor-causing residue
How to Deep Clean:
- Remove all food; check expiration dates
- Take out all removable shelves, drawers, and bins
- Wash removable parts in hot soapy water
- Wipe interior with solution: 1 tablespoon baking soda per quart water
- Pay attention to door seals and gaskets
- Clean bottle holder grooves and egg trays
- Dry everything before replacing
- Organize food by category and expiration date
- Place open box of baking soda inside for odor absorption
Frequency: Monthly deep clean; weekly spot cleaning
5. Inside Cabinet and Drawer Corners
Why It’s Forgotten: We organize what’s inside but rarely empty completely to clean the space itself.
What Accumulates:
- Crumbs and food particles
- Spilled liquids and sticky residue
- Dust and grease
- Pest droppings in severe cases
- Old spices or expired items pushed to back
How to Clean:
- Remove all contents from cabinet or drawer
- Vacuum corners and crevices
- Wipe surfaces with all-purpose cleaner
- Pay special attention to corners where cabinets meet
- Clean cabinet door interiors
- Wipe down items before returning
- Discard expired or unused items
- Use shelf liners for easier future cleaning
Frequency: Deep clean twice yearly; organize quarterly
6. Under and Behind Appliances
Why It’s Forgotten: Heavy appliances are difficult to move, and the space isn’t visible during daily use.
What Accumulates:
- Grease splatter behind stove
- Crumbs and food under toaster and coffee maker
- Dust and debris under dishwasher
- Spills that drip down sides
- Lost utensils and small items
How to Clean:
- Unplug small appliances before moving
- Pull out appliances carefully (get help for heavy ones)
- Sweep or vacuum accumulated debris
- Wipe down appliance sides and backs
- Clean wall and floor behind appliance
- Wipe down countertop underneath
- Clean appliance feet or wheels
- Push appliances back carefully
Frequency: Every 3-6 months; immediately after spills
7. Range Hood and Filter
Why It’s Forgotten: High up and covered with a vent—easy to ignore until visibly dripping with grease.
What Accumulates:
- Thick grease buildup
- Dust mixed with oil
- Food splatter
- Reduced ventilation efficiency
- Fire hazard when excessive
How to Clean:
- Remove filter (check manual for instructions)
- Soak filter in hot water with degreasing dish soap
- Add baking soda for extra cleaning power
- Scrub filter with brush
- Rinse thoroughly and let dry completely
- Wipe hood exterior with degreaser
- Clean hood interior and fan blades (carefully)
- Replace or reinstall clean filter
Frequency: Filter every month; full hood every 3 months
8. Inside Microwave (Including Door Seals)
Why It’s Forgotten: Quick wipe of the interior is common, but door seals, vents, and beneath the turntable are overlooked.
What Accumulates:
- Dried food splatters
- Grease on ceiling and walls
- Bacteria in door seal crevices
- Food particles under turntable
- Odors from past cooking
How to Clean:
- Remove turntable and wash in sink
- Fill microwave-safe bowl with 1 cup water and 1/4 cup vinegar
- Microwave on high for 5 minutes (creates steam)
- Let sit 2-3 minutes without opening door
- Carefully remove bowl (will be hot)
- Wipe interior with damp cloth—grime removes easily
- Clean door seal with cotton swab or old toothbrush
- Wipe exterior and control panel
- Replace clean turntable
Frequency: Weekly for regular use; immediately after spills
9. Small Appliance Interiors
Why They’re Forgotten: Coffee makers, toasters, blenders, and food processors are used daily but rarely cleaned inside.
Coffee Maker:
- Mineral deposits in water reservoir
- Mold in carafe and water lines
- Bacteria in drip tray
How to Clean:
- Run mixture of equal parts water and white vinegar through brew cycle
- Run 2-3 cycles of plain water to rinse
- Wash removable parts in soapy water
- Wipe exterior
Toaster/Toaster Oven:
- Burnt crumbs in bottom
- Grease on heating elements
- Fire hazard from buildup
How to Clean:
- Unplug and let cool completely
- Remove crumb tray and wash
- Shake out loose crumbs over trash
- Use soft brush for stuck crumbs
- Wipe interior with damp cloth (avoid heating elements)
- Clean exterior with all-purpose cleaner
Blender:
- Fill halfway with warm water
- Add drop of dish soap
- Blend on high for 30 seconds
- Rinse thoroughly
- Disassemble blade assembly periodically for deep clean
Frequency: Weekly to monthly depending on use
10. Sink Drain and Garbage Disposal
Why It’s Forgotten: The drain is functional until it’s slow or smelly—then it gets attention.
What Accumulates:
- Food particles and grease buildup
- Bacteria and mold
- Unpleasant odors
- Slow drainage
- Potential clogs
How to Clean Drain:
- Pour 1/2 cup baking soda down drain
- Follow with 1 cup white vinegar
- Cover drain and let fizz for 15 minutes
- Flush with boiling water
- Repeat if needed for stubborn odors
How to Clean Garbage Disposal:
- Turn off disposal and unplug if possible
- Use flashlight to check for foreign objects
- Pour 1 cup ice cubes and 1/2 cup salt into disposal
- Run cold water and turn on disposal until ice is gone
- Add citrus peels and grind for fresh scent
- Pour baking soda down disposal and leave overnight
Frequency: Weekly drain treatment; monthly deep clean
For more detailed guidance, see our article on how to clean and unclog a sink.
11. Cabinet Door Handles and Drawer Pulls
Why They’re Forgotten: We use them constantly but rarely think to clean them specifically.
What Accumulates:
- Greasy fingerprints
- Food residue from cooking hands
- Bacteria transfer from raw meat handling
- Sticky buildup over time
- One of the germiest spots in kitchen
How to Clean:
- Mix warm water with dish soap or all-purpose cleaner
- Wipe each handle and pull individually
- Use old toothbrush for crevices in detailed hardware
- Dry thoroughly to prevent water spots
- Polish metal hardware if desired
- Consider switching to antimicrobial hardware
Frequency: Weekly or whenever you clean counters
12. Light Fixtures and Ceiling Fans
Why They’re Forgotten: High up, overlooked, and covered with greasy film from cooking.
What Accumulates:
- Grease and dust combination
- Dead insects inside fixtures
- Reduced light output from grime
- Sticky residue from cooking vapors
How to Clean:
- Turn off power at breaker for safety
- Remove light covers/shades
- Wash glass covers in warm soapy water
- Vacuum or dust light bulbs when cool
- Wipe fixture base and ceiling mount
- Clean ceiling fan blades with damp cloth
- Dry completely before reassembling
Frequency: Every 3-6 months
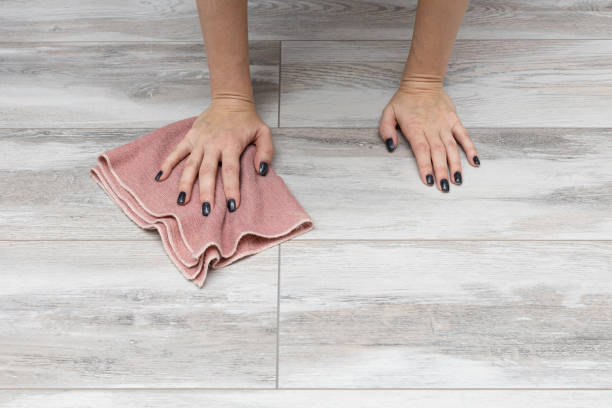
13. Baseboards and Floor Edges
Why They’re Forgotten: Below line of sight and easy to overlook when mopping.
What Accumulates:
- Dust and dirt
- Food crumbs and spills
- Grease splatter
- Pet hair
- Kicked-up debris
How to Clean:
- Vacuum with brush attachment first
- Wipe with damp microfiber cloth
- Use magic eraser for scuff marks
- Clean corners where baseboards meet
- Dry thoroughly to prevent damage
- Use old toothbrush for textured baseboards
Frequency: Monthly; more often in high-traffic kitchens
14. Behind Sink Faucet
Why It’s Forgotten: Tight space that’s difficult to reach and not visible during normal use.
What Accumulates:
- Soap scum and toothpaste (if kitchen has prep sink)
- Water spots and mineral deposits
- Grime around base
- Mold if constantly wet
- Food particles
How to Clean:
- Use old toothbrush to scrub around faucet base
- Wrap toothbrush in microfiber cloth for tight spaces
- Use vinegar for mineral deposits
- Cotton swabs for very tight crevices
- Dental floss can clean impossible-to-reach spots
- Dry completely to prevent mold
Frequency: Weekly as part of sink cleaning
15. Inside Dishwasher (Filter, Seals, and Spray Arms)
Why It’s Forgotten: Self-cleaning myth—people assume dishwashers clean themselves.
What Accumulates:
- Food particles in filter
- Grease and soap scum on walls
- Mineral deposits on spray arms
- Mold in door seal
- Reduced cleaning efficiency
How to Clean:
- Remove bottom rack to access filter
- Remove filter and rinse under hot water
- Scrub filter with soft brush
- Wipe door seals with vinegar solution
- Remove spray arms and clear holes with toothpick
- Wipe interior walls and door
- Run empty cycle with 2 cups white vinegar in top rack
- Follow with baking soda sprinkled on bottom, run short cycle
- Replace filter and racks
Frequency: Filter monthly; full clean every 3 months
Creating a Comprehensive Kitchen Cleaning Schedule
To ensure these forgotten spots don’t remain neglected, incorporate them into a systematic cleaning routine.
Daily Tasks (5-10 minutes)
- Wipe counters and stovetop
- Wash dishes or load dishwasher
- Sweep floor
- Clean up spills immediately
- Wipe cabinet handles
Weekly Tasks (30-45 minutes)
- Mop floors and baseboards
- Deep clean sink and drain
- Clean microwave interior
- Wipe appliance exteriors
- Empty and wipe refrigerator shelves
- Clean coffee maker
Monthly Tasks (1-2 hours)
- Clean inside oven
- Wash range hood filter
- Deep clean refrigerator
- Clean dishwasher filter and interior
- Organize cabinets and pantry
- Wipe light fixtures
Quarterly Tasks (2-3 hours)
- Move appliances and clean behind/under
- Deep clean oven and stovetop
- Clean refrigerator coils
- Empty and clean all cabinets
- Descale coffee maker
- Wash ceiling fan and light fixtures
Bi-Annual Tasks (Half day)
- Deep clean inside all appliances
- Reorganize entire kitchen
- Check for expired items
- Clean top of refrigerator and cabinets
- Professional appliance maintenance
For help creating a personalized cleaning schedule, check out our guide on how to create a cleaning schedule.
Essential Kitchen Cleaning Tools
Having the right tools makes tackling these forgotten spots much easier:
Basic Supplies:
- Microfiber cloths (multiple colors to avoid cross-contamination)
- Scrub brushes in various sizes
- Old toothbrush for tight spaces
- Magic erasers for stubborn marks
- Vacuum with attachments
- Step stool for high areas
Cleaning Solutions:
- All-purpose cleaner
- Degreaser
- White vinegar
- Baking soda
- Dish soap
- Hydrogen peroxide
Specialty Tools:
- Refrigerator coil brush
- Grout brush
- Bottle brush for narrow containers
- Microfiber mop
- Steam cleaner (optional but effective)
For natural cleaning alternatives, see our article on benefits of green cleaning.
When to Call Professional Kitchen Cleaners
While regular maintenance keeps most areas manageable, professional cleaning services offer advantages:
Deep Cleaning Situations:
- Moving in or out of home
- Before or after holiday entertaining
- Post-renovation cleaning
- Accumulated neglect requiring intensive attention
- Preparing home for sale
Time and Energy Savings:
- Busy schedules prevent thorough cleaning
- Physical limitations make certain tasks difficult
- Professional equipment achieves superior results
- Systematic approach ensures nothing’s missed
Expertise and Efficiency:
- Knowledge of proper products for each surface
- Experience with tough grease and grime
- Understanding of food safety requirements
- Faster completion than DIY efforts
BraBos Professional Kitchen Cleaning Services
At BraBos Cleaning Services, we understand that kitchens require special attention to detail. Our experienced team knows exactly where dirt and bacteria hide, and we have the tools and expertise to thoroughly clean even the most overlooked areas.
What Our Kitchen Cleaning Includes
Comprehensive Coverage:
- All surfaces, including forgotten spots
- Inside and outside of appliances
- Cabinet exteriors and hardware
- Detailed attention to high-touch areas
- Floor and baseboard cleaning
- Proper sanitization for food safety
Professional Results:
- Trained cleaning professionals
- Food-safe cleaning products
- Systematic approach ensuring nothing’s missed
- Attention to your specific priorities
- Respect for your home and belongings
Complete Cleaning Services
- Deep Cleaning Services – Intensive kitchen cleaning including all hidden spots
- House Cleaning – Regular maintenance including kitchen care
- Apartment Cleaning – Thorough cleaning for smaller kitchens
- Recurring Cleaning Services – Consistent kitchen maintenance
- Move-In/Move-Out Cleaning – Complete kitchen sanitization
- One-Time Cleaning – Special deep kitchen cleaning
- Maid Services – Ongoing kitchen upkeep
- Commercial Cleaning – Restaurant and commercial kitchen cleaning
- Airbnb Cleaning – Kitchen turnovers for vacation rentals
Serving Kitchens Throughout Boston
Boston Neighborhoods: South End, Back Bay, South Boston, Allston, Bay Village, Beacon Hill, Brighton, Charlestown, Chinatown, Dorchester, Downtown, East Boston, Fenway-Kenmore, Hyde Park, Jamaica Plain, Mattapan, Mission Hill, North End, Roslindale, Roxbury, Seaport, West End, West Roxbury
Surrounding Communities: Brookline, Cambridge, Newton, Lexington, Belmont, Arlington, Wellesley, Natick, Needham, Winchester, Milton, Watertown, Somerville, Wakefield, Reading, Melrose, Burlington, Waltham, Medford, Norwood, Braintree, Framingham, Quincy, Dedham, Woburn, Malden, Stoneham, Wilmington, Winthrop, Methuen, Saugus, Revere, Peabody, Everett, Lynn, Canton
Get Your Kitchen Professionally Cleaned
Don’t let these forgotten spots harbor bacteria and affect your kitchen’s cleanliness. Whether you need a one-time deep clean or regular maintenance, BraBos Cleaning Services ensures every corner of your kitchen is spotless and sanitary.
Ready for a truly clean kitchen?
✓ Book online for convenient scheduling ✓ Get a free quote customized for your needs
With over 7 years of experience, professional-grade cleaning methods, and our 100% Satisfaction Guarantee, BraBos delivers the thorough kitchen cleaning your family deserves.


